Custom Vision Service is one of Azure Cognitive Services that helps detecting objects within images. You can consider this service as a special type of image classification model that classify the image as a whole.
In this blog post, you will learn how:
- Create custom vision service
- Train the machine learning model
- Test the machine learning model
- Publish the service to be used in your solution
This post is part of azure cloud scenario post where I talk about how to implement a cloud solution for a marketing campaign contest with AI verification.
Create a Custom Vision Service resource
Creating the Custom Vision Service step by step on Azure Portal, so you go to Azure Marketplace and search for Custom Vision.
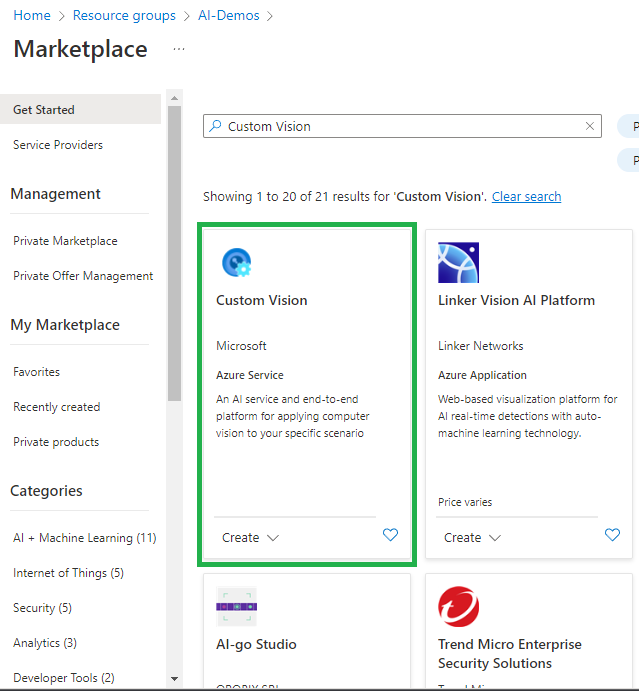
Click “Create”, then go to first page of Custom Vision Service
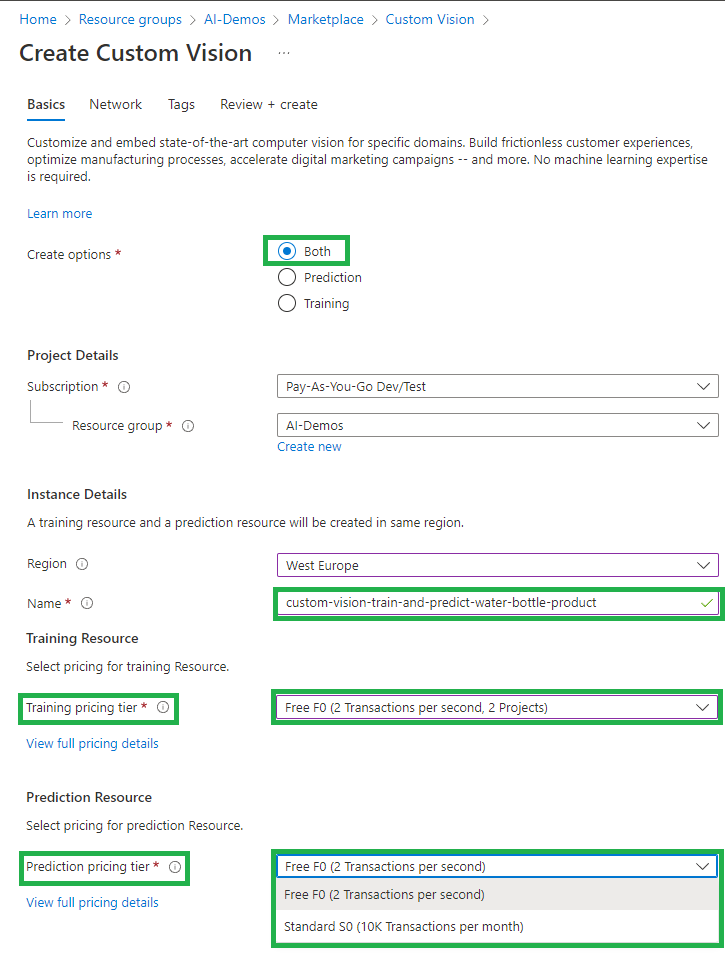
- Choose the preferred region based on the business requirements
- The name of the service
- Pricing tier: Choose the free tier for the demo, but in the real scenario it should be the Standard for both training and prediction service
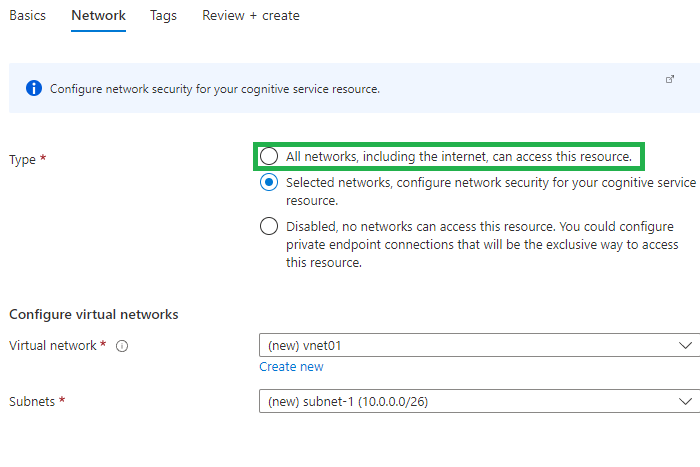
Then, click next and go to “Network” tab:
- You could choose all networks for the demo, but in real case scenarios the service must be contained in a network to limit the access to the service. Another choice is a private endpoint connection for exclusive way to access the resource.
After validating the input and clicking “Create”, the resource will be deployed!
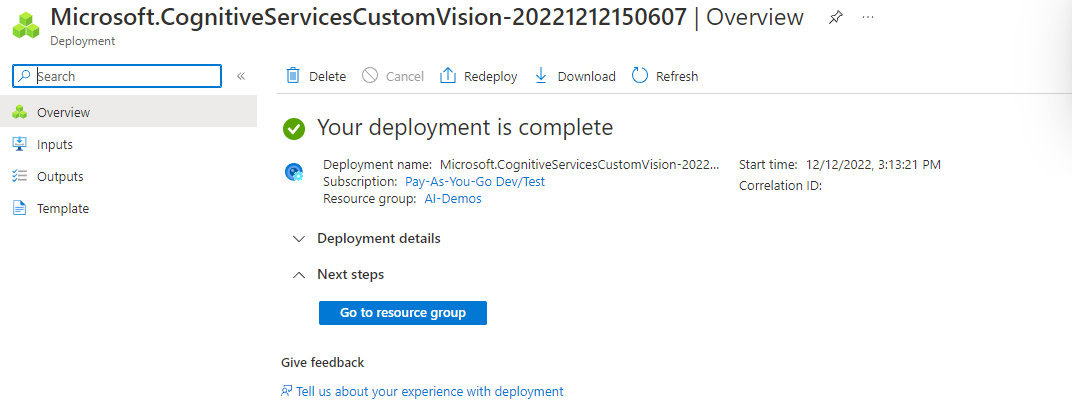
So, if you go to the resource group, you should find two custom vision services:
- Training service
- Prediction service
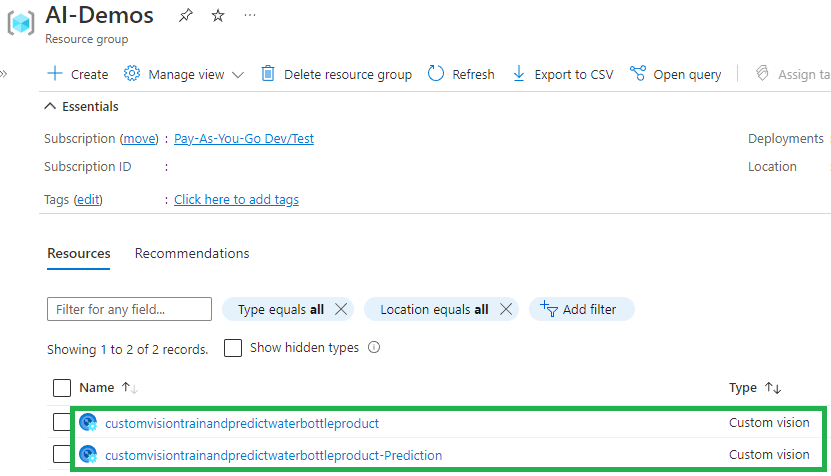
And that’s all! You have your service ready, let’s move to next step!
Create a Custom Vision Project
First, go to https://customvision.ai and login with your same credential you use on Azure Portal to access your subscription.
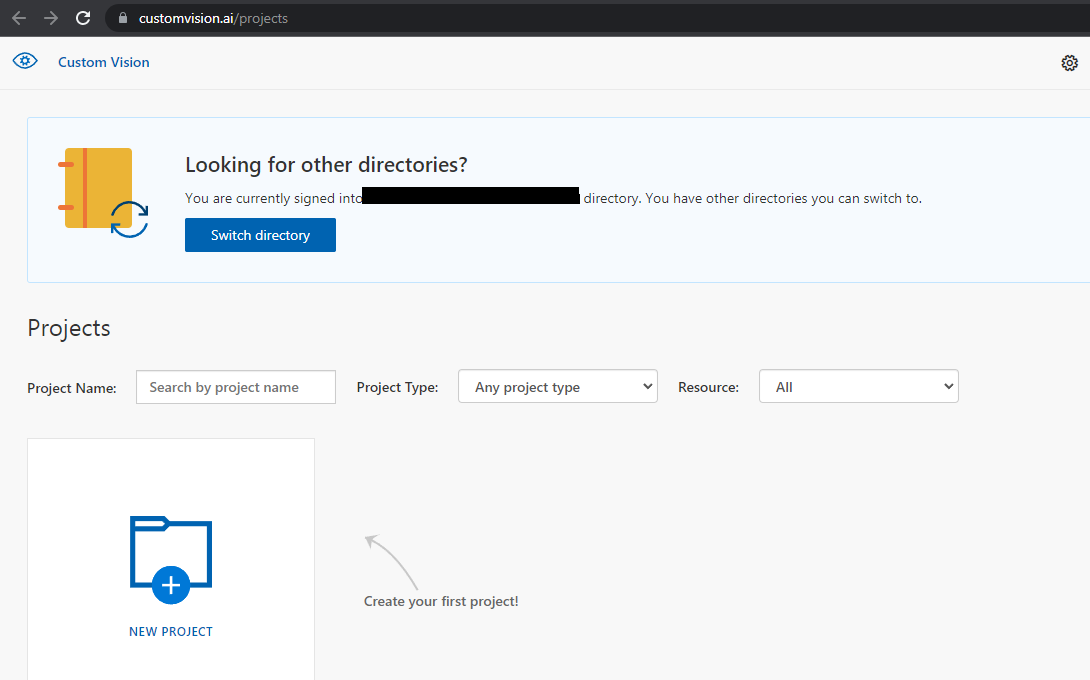
Then, create a new project:
- Choose a name and description
- You will notice that your custom vision service appears in the combo box
- Choose Object Detection as the project type
- Choose the nearest domain possible to your case, in our case I will try “Products on Shelves”
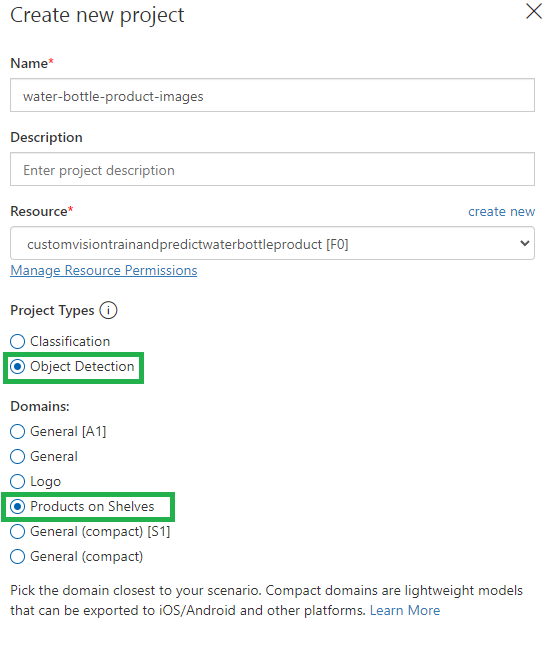
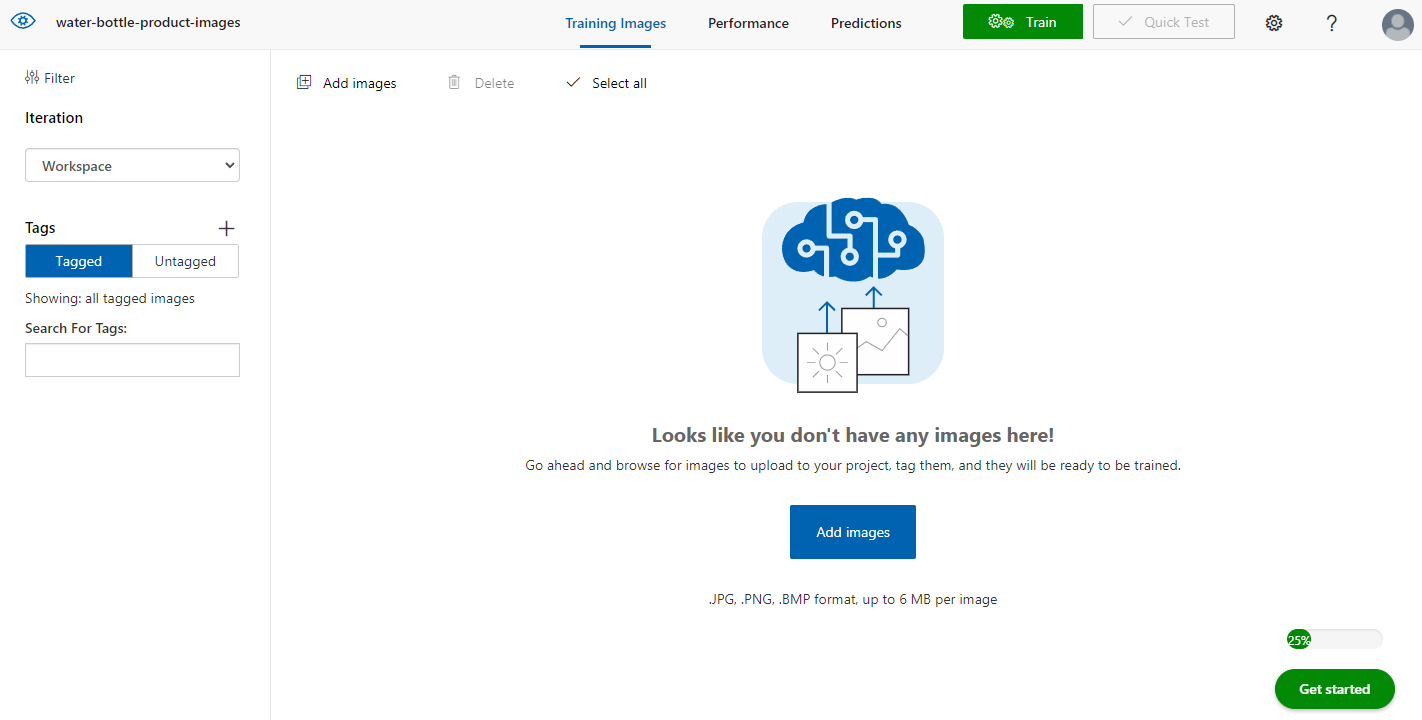
After that, you will be redirected to the project dashboard where you start upload the images to train your model.
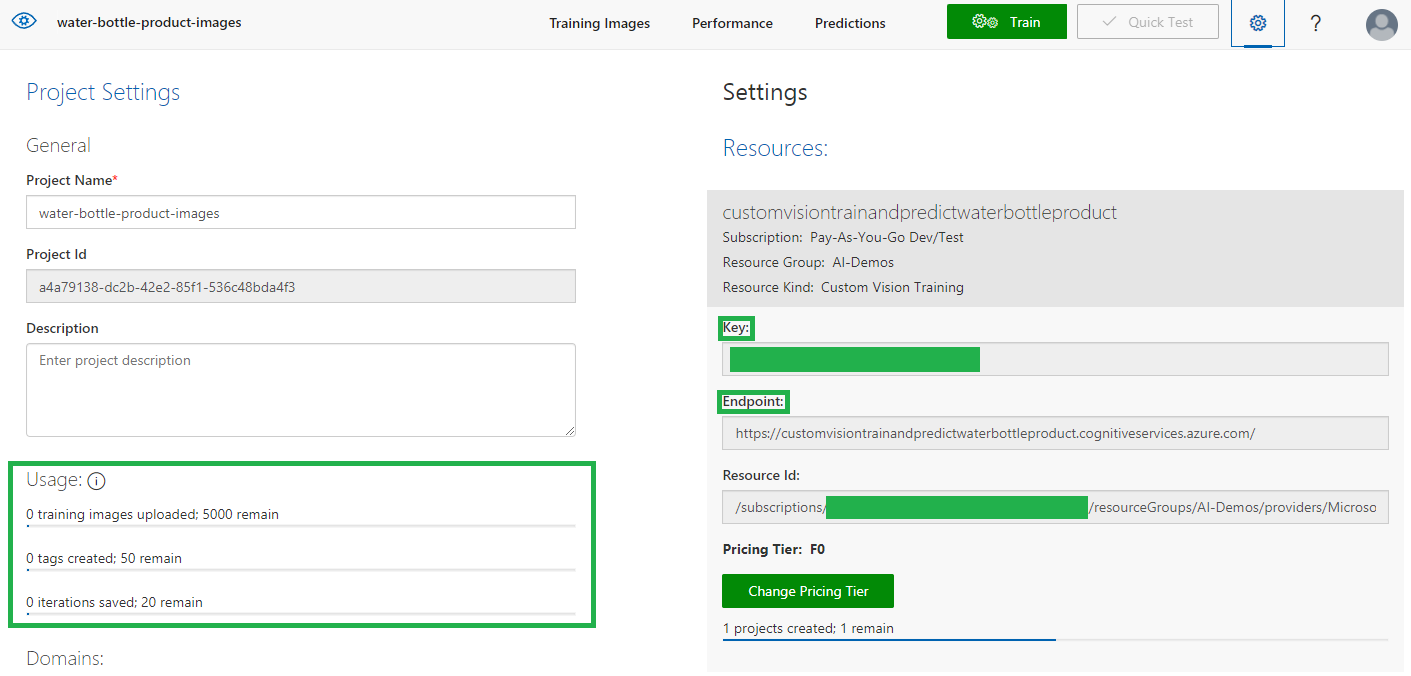
Before you move to next step, you can check the project settings to check the usage status.
Train and Test the Object Detection Model
To train an object detection model, you need to upload images that contain the classes you want the model to identify, and tag them to indicate bounding boxes for each object instance.
I have uploaded 34 different images of the product, I did my best to take images in different situations to simulate the real photos taken by end users.
You must have at least 15 images for each tag before you can train the model. It is also recommended to have 50 images for each tag to get a better performance.
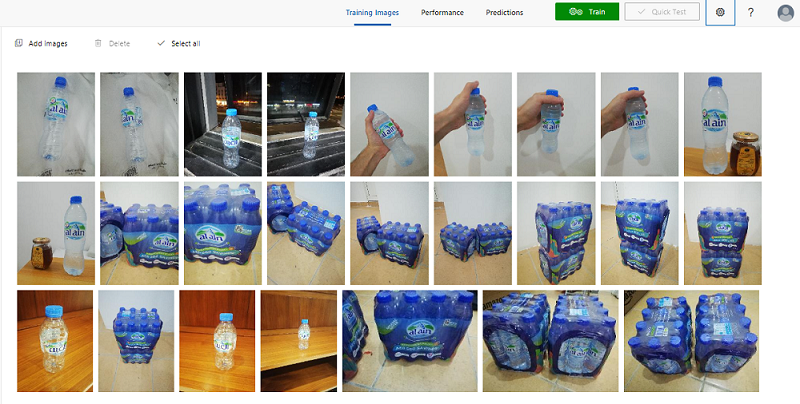
Then, you tag the bottle, the logo, and the bottle pack in each image.
Here are some examples:
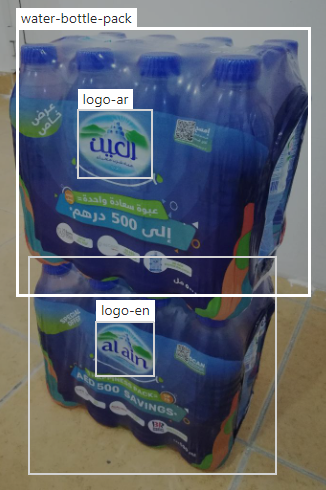
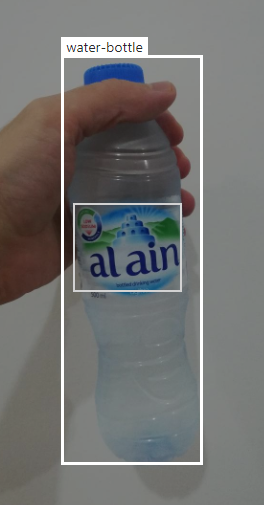
I have tagged the images with the following tags:
- “logo-ar” for the Arabic logo
- “logo-en” for the English logo
- “water-bottle” for the single water bottle
- “water-bottle-pack” for the water bottle pack
The project dashboard gives you the total number of each tag as well. Remember you must have at least 15 samples of each tag.
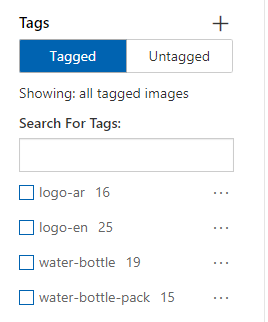
More tags might be used based on the scenario we are trying to handle.
The next step is to train the model:
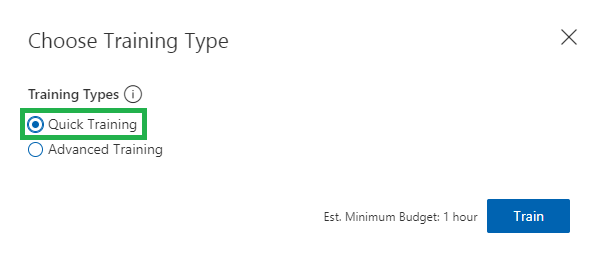
- Click “Train Model” and choose “Quick Training”. You can choose the Advanced choice but for quick iteration I think quick training will do the job.
- Click “Train” in the popup window.
- It may take some minutes based on the data set you have provided. In my case, it took between 5 to 7 minutes each time I try.
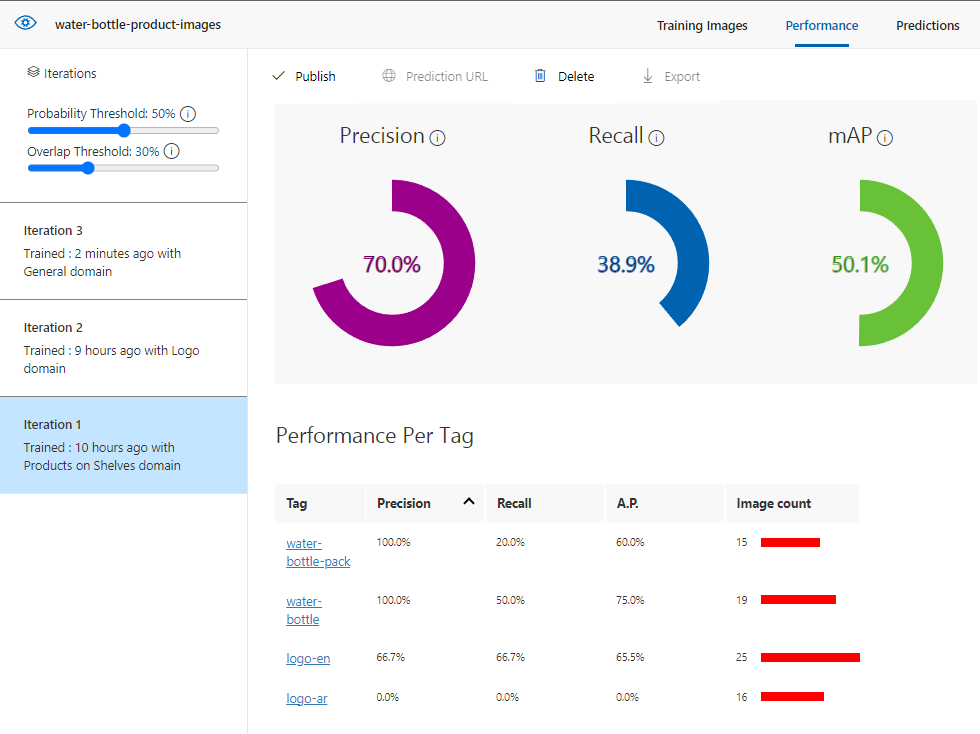
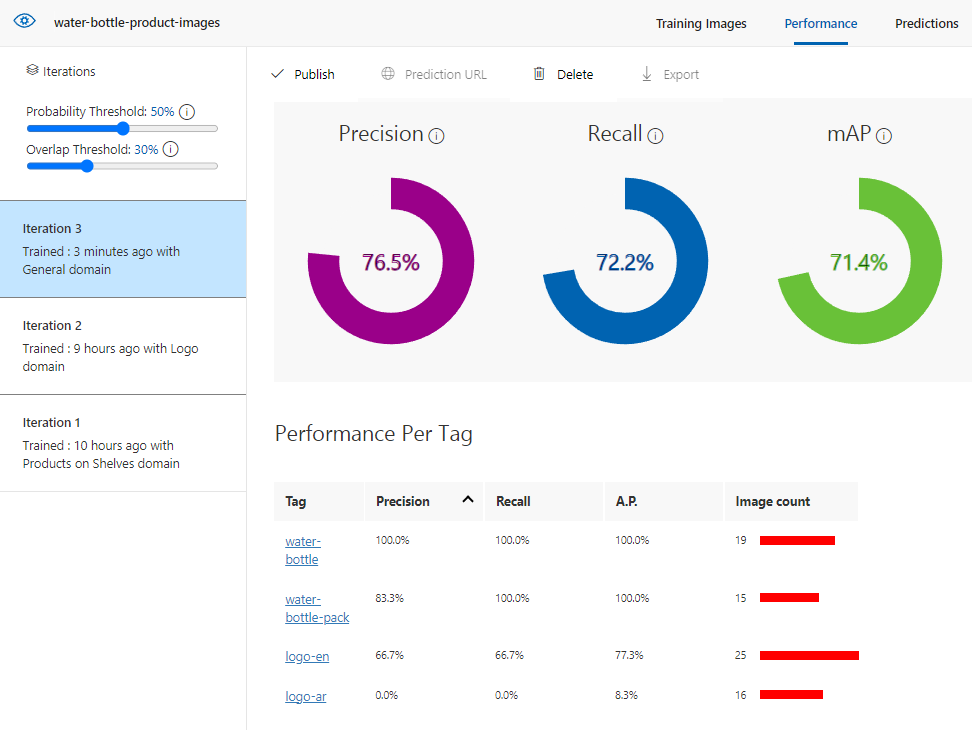
In each result, you should focus on 3 performance metrics:
- Precision: it refers to the number of successful predictions to the total number of predictions. if the model predicted 100 images that contain water bottle, where only 70 of them actually has a water bottle, then the precision is 70%.
- Recall: if we have 100 images that have water bottle object, but the model predicted 80 of them only, then the recal is 80%
- mAP (mean average precision)
I can also check the performance metrics for each tag separately.
The following results are for different three iterations with different domains on the same images and tags.
Iteration 1 with product on shelves domain
I tested the model with some images and the result wasn’t good enough to use the model:
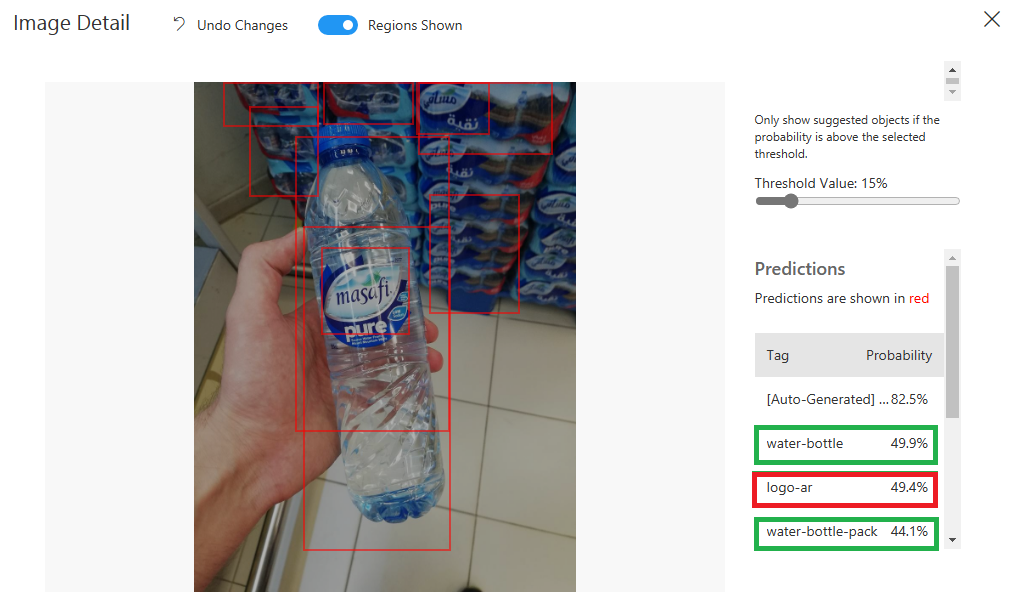
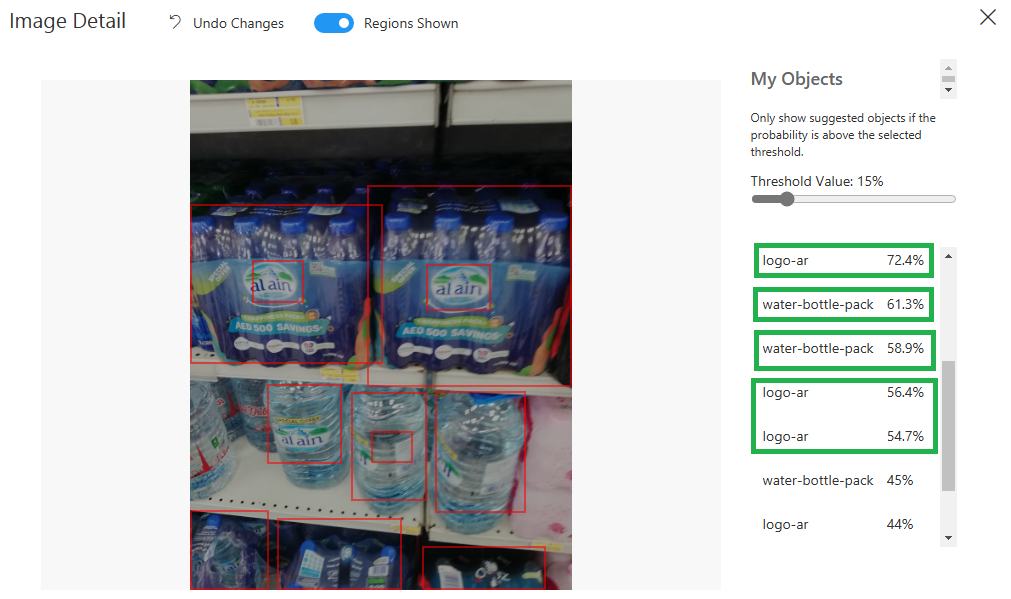
I have tested the model with many images, but I wanted to try another domain.
Let’s move to logo domain!
Iteration 2 with logo domain
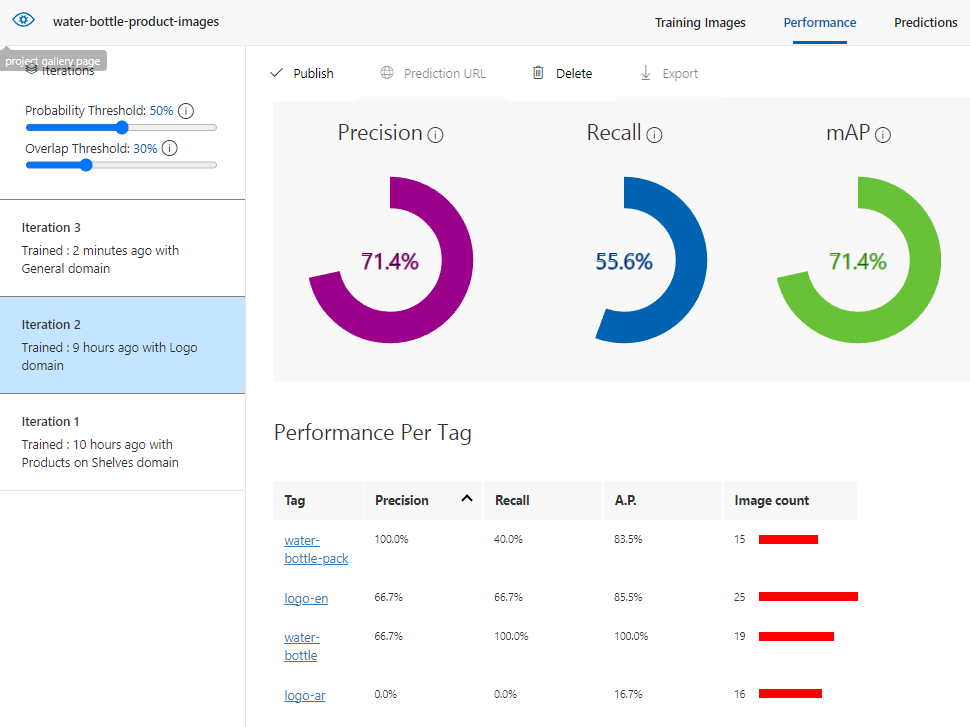
The result wasn’t good enough at all, actually some detection was completely wrong.
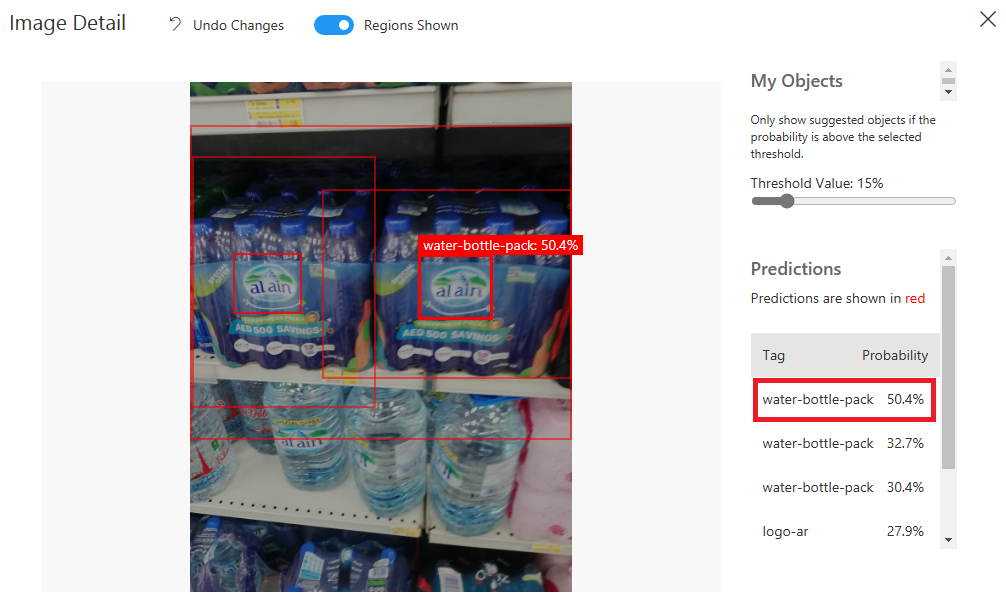
Then, I tried the general domain:
Iteration 3 with general domain
And here is a test example:
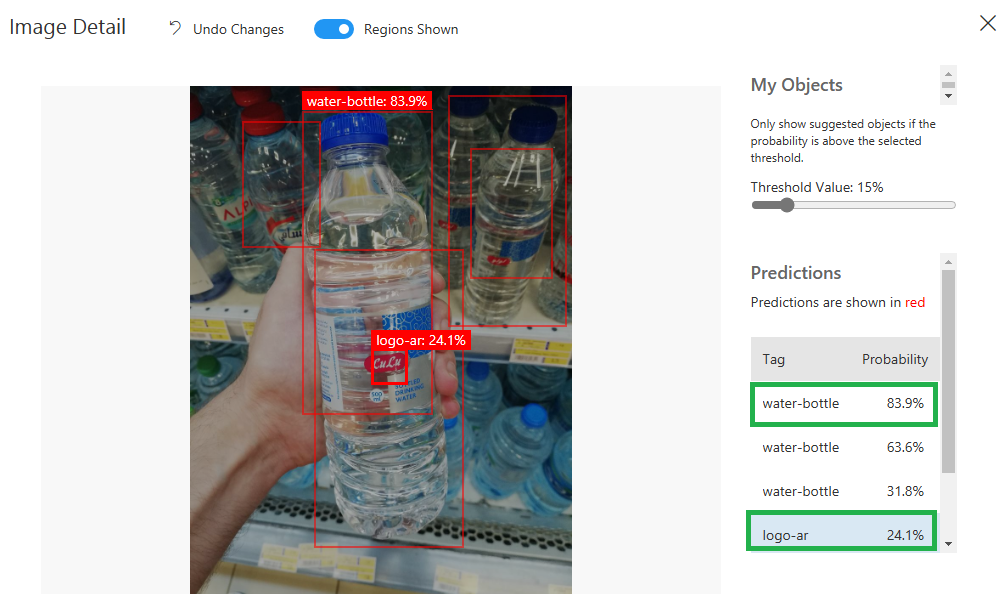
As you can see, the last iteration was relatively better than the two before, but I have to improve it more, especially the “logo-ar” and “logo-en”. So, I will do the following steps to improve the performance:
- Add more images with different backgrounds, lights, and angles.
- merge the “logo-en” and “logo-ar” with one tag “logo”, because both logos are similar in Arabic and English, and the model is confusing them.
Iteration 4 with General domain again!
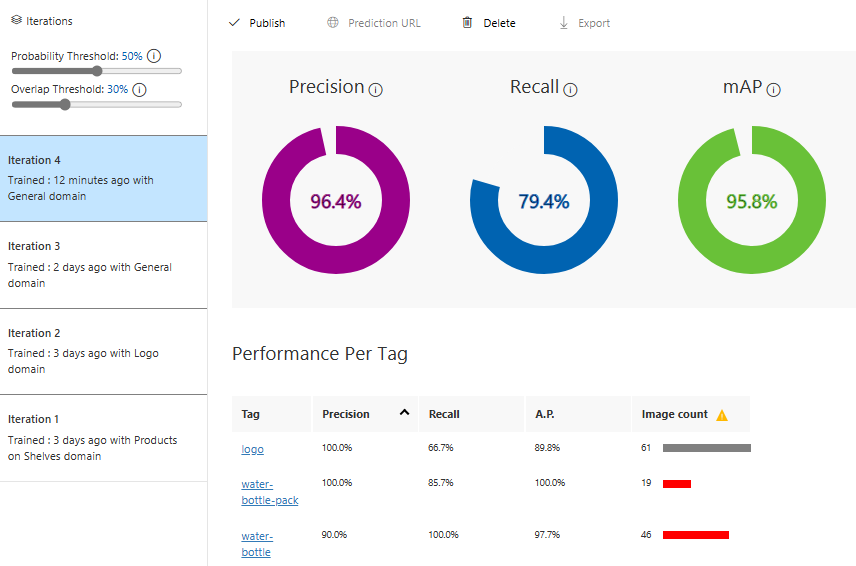
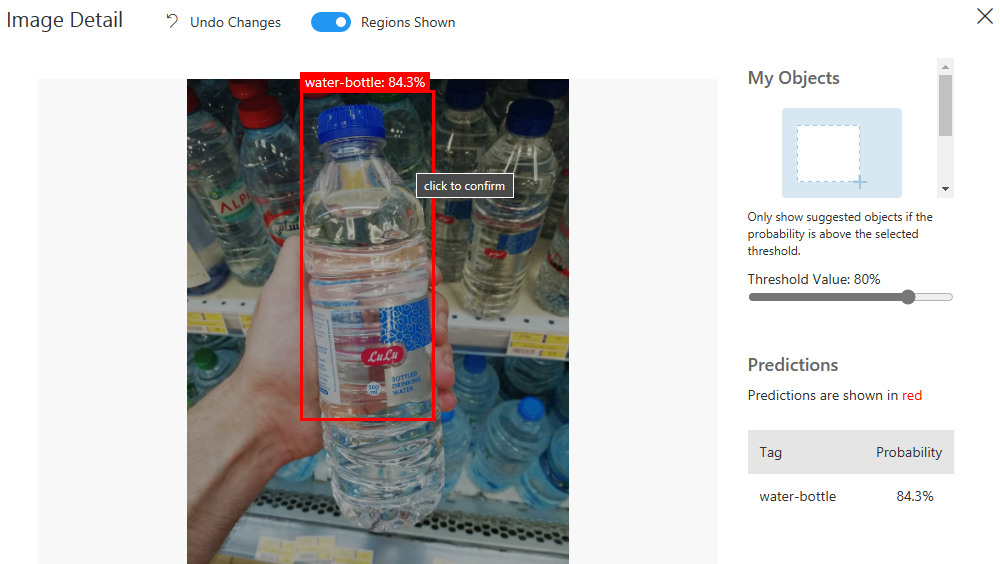
The metrics is better now, and the logo is optimized more:
Publish the Object Detection Model
After training the model, we can publish it:
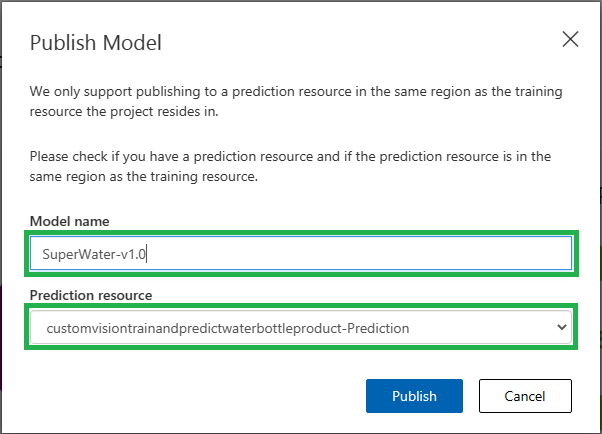
- After we click on the Iteration4 model, we click “Publish”
- Fill the name of the model
- Select the Prediction resource we already created to publish the model to.
After successful publishing, we can use the prediction service API, click on “Prediction URL” to see how to make a call for the prediction API.
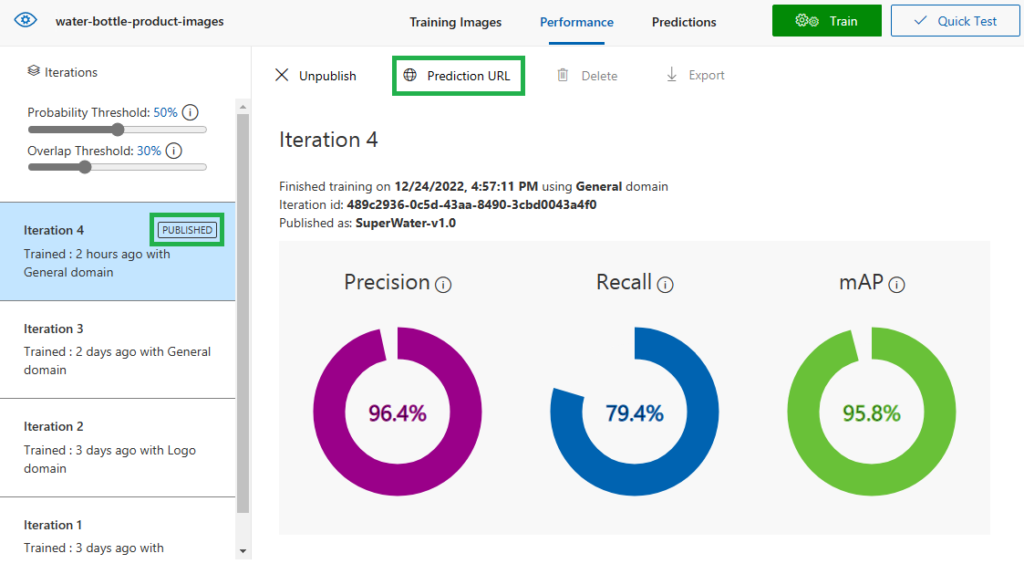
The prediction service is published now! and ready to be called and utilized as part of our solution.
There is one last amazing part of the custom vision service, which is the ability to export the model to be used locally in Android/iOS or on the web browser.
Iteration 5 Exporting the model to use with TensorFlow.js
Custom Vision Service supports many export options:
- TensorFlow for Android
- Tensorflow for JavaScript Frameworks like React, Angular, and Vue
- CoreMl for iOS11
and other options mentioned in the documentation.
Before exporting, the model should be converted to compact model. like General (compact). the next iteration of our model will be trained with General (compact) domain.
First, let’s go to the project settings and change to General (compact)
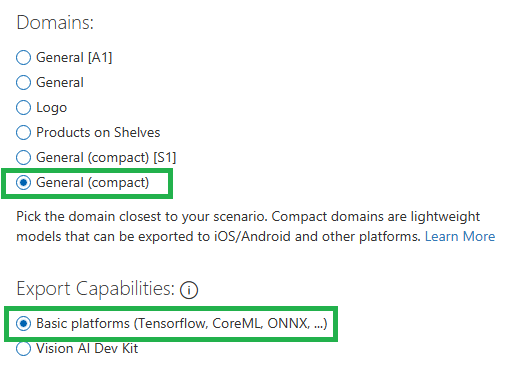
Then, we can go to Performance tab and click “Train” again to train the model.
When the training finishes, I can export the model to TensorFlow.js platform
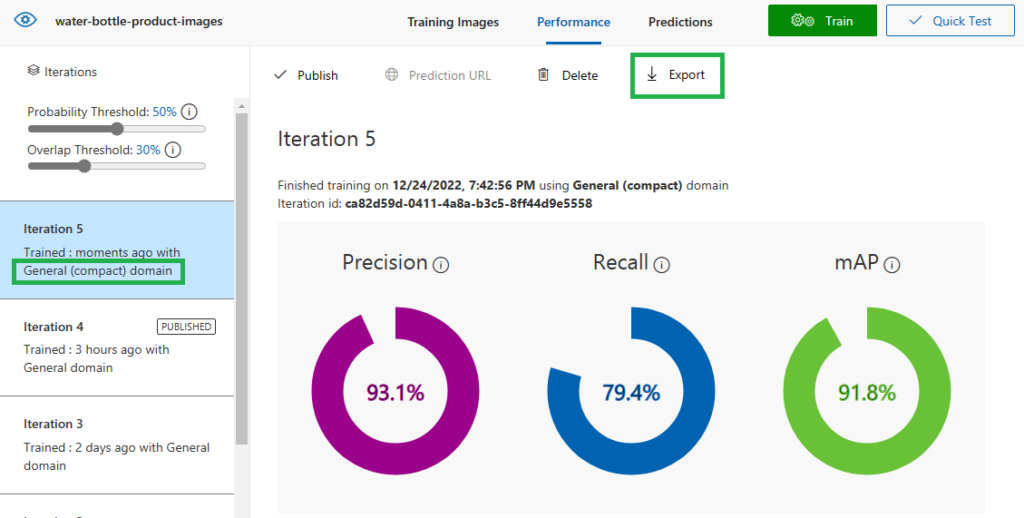
Then, you have to choose the platform “TensorFlow”, then you can download the model as a zip file
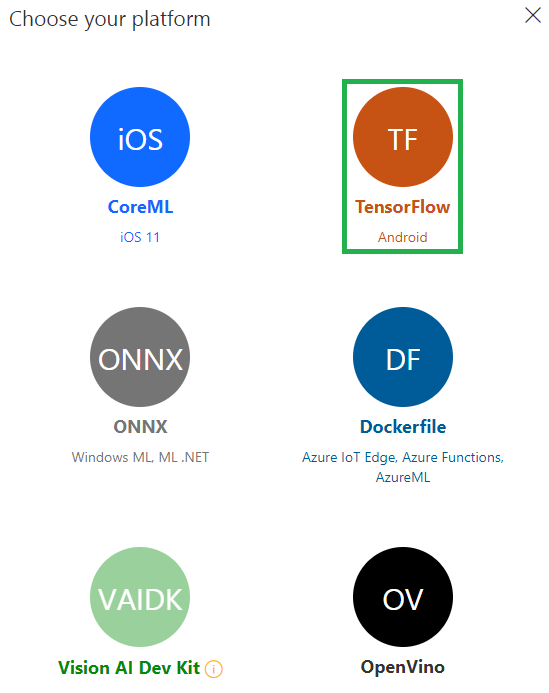
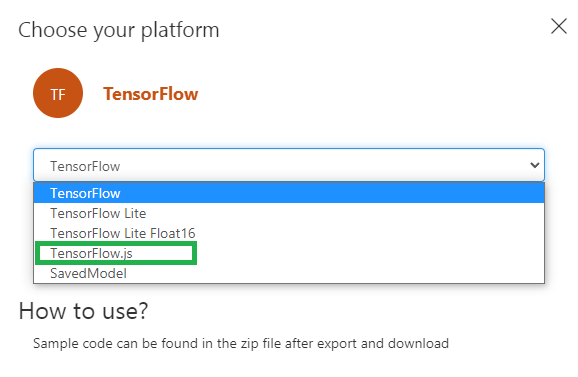
The downloaded zip file contains many files, You can use this npm package to use the exported file in your web.
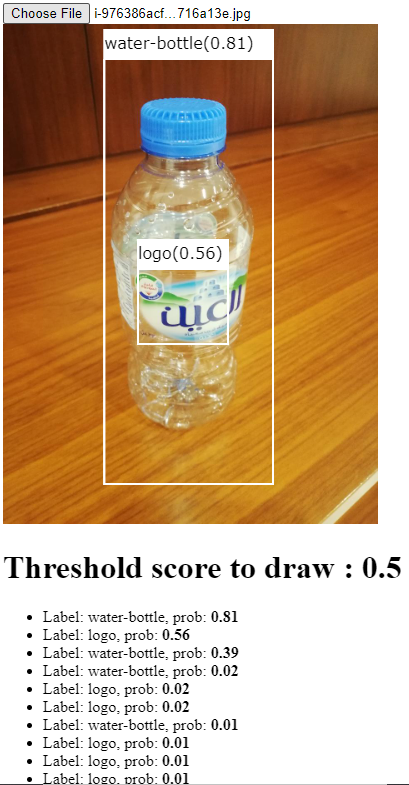
You can also check the exported files with sample html page on my GitHub repo.
Here is the result of the html page that support predicting the objects:
Recap
You can use Custom Vision Service to Train, Test, and Publish your custom trained machine model to be used by your application.
You can also export the model to be used locally on iOS, Android, or embedded in the Web app, but you have to use the “General (Compact)” domain.